
Asking how to migrate Rubi block assets to wallet?, how to migrate Rubi assets to wallet?, how to migrate Rubi network token to wallet?, how to migrate Rubi network to wallet?, here we have provided answers to those questions.
Advertisements
Step-by-Step Guide to Migrate Rubi Block Assets to Wallet with Screenshot
Learn the ins and outs on how to migrate Rubi block assets to wallet effortlessly with this step-by-step guide. As a Rubi block miner who has passed Rubi block Kyc verification, the next step is for you to migrate your mined Rubi block assets to your wallet.
Step-by-step to migrate Rubi Block Assets to Wallet
Step 1: confirm if your Kyc verification status is fully Verified .
To confirm the status of your Rubi Kyc verification, please adhere to the following instructions for confirmation:
1. Launch and Log in to your Rubi mining app.
Advertisements
2. Navigate to the “Personal” section on your homepage.
3. Access the “User Verification” option.
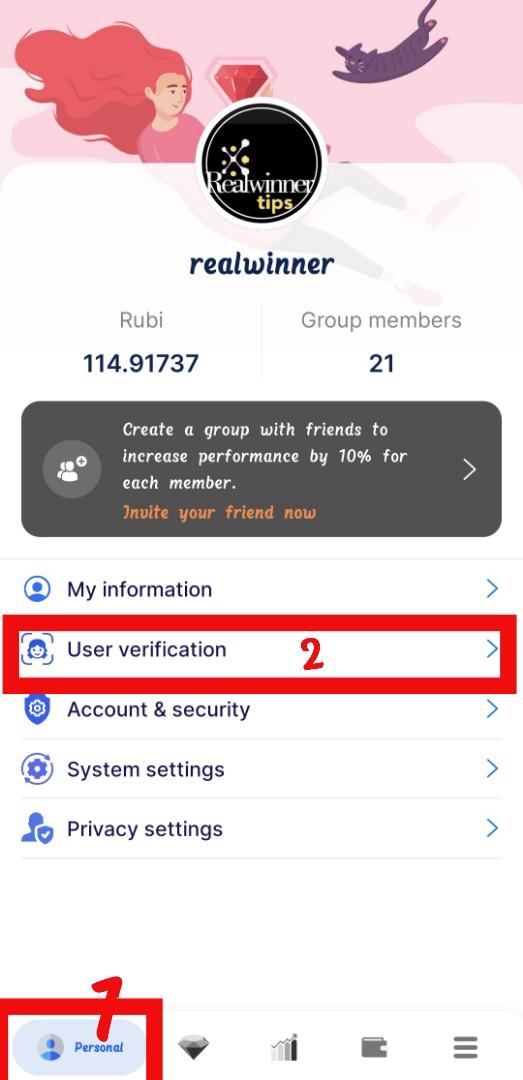
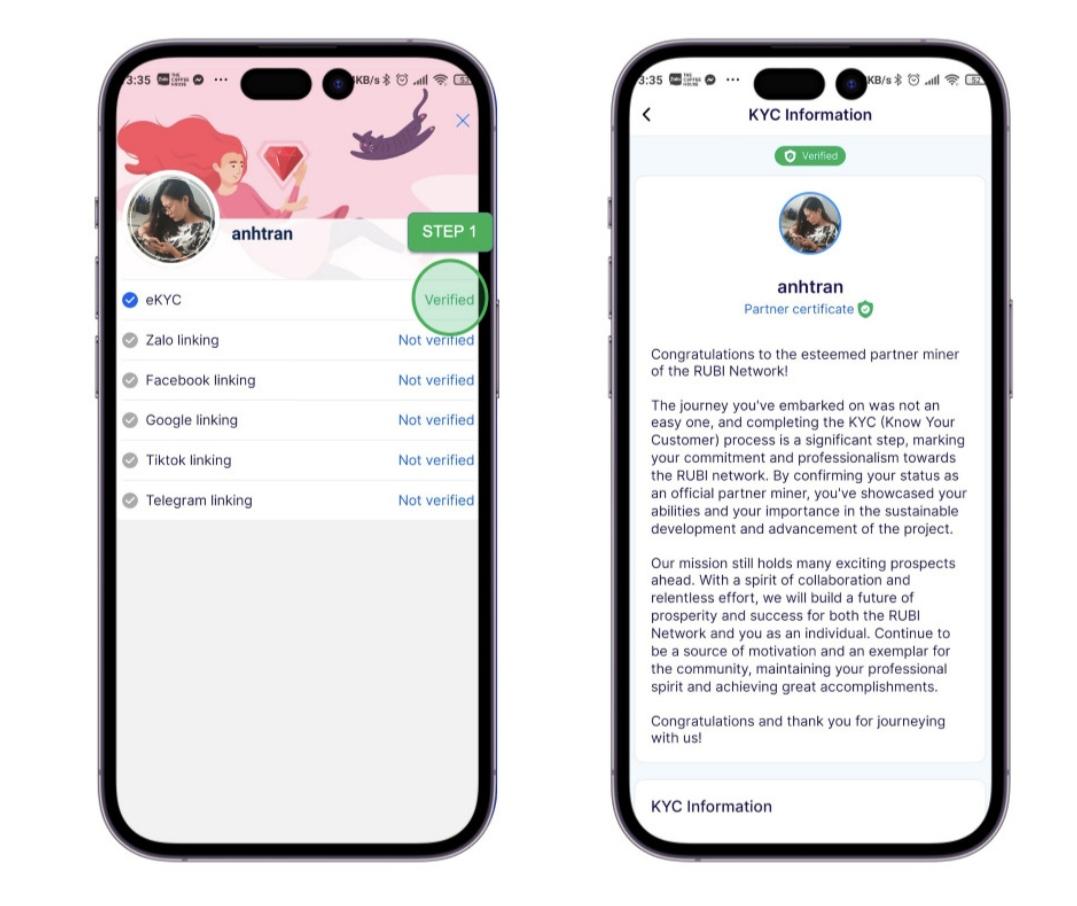
4. Here, you will encounter your Kyc status, which can be one of this three: “Verified,” “Pending,” or “Not Verified.” If you find the status as “Verified,” congratulations, you are now eligible to proceed with migrating your mined Rubi assets to your wallet.
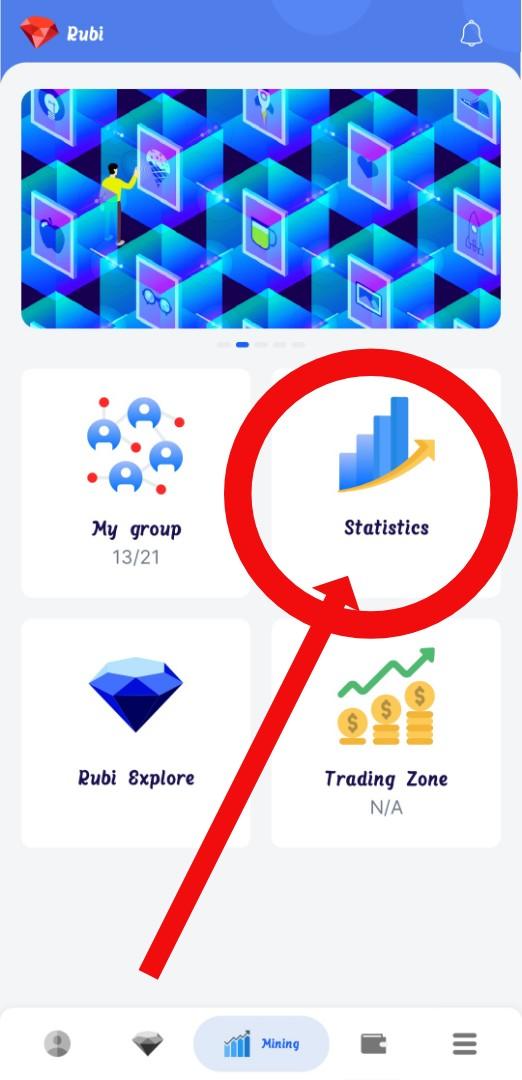
Step 2: Head to the homepage and click on the “Mining” button to access the application’s resource “Statistics”.
Step 3: Choose “statistics” to view comprehensive information about your mining journey and team members.
Advertisements
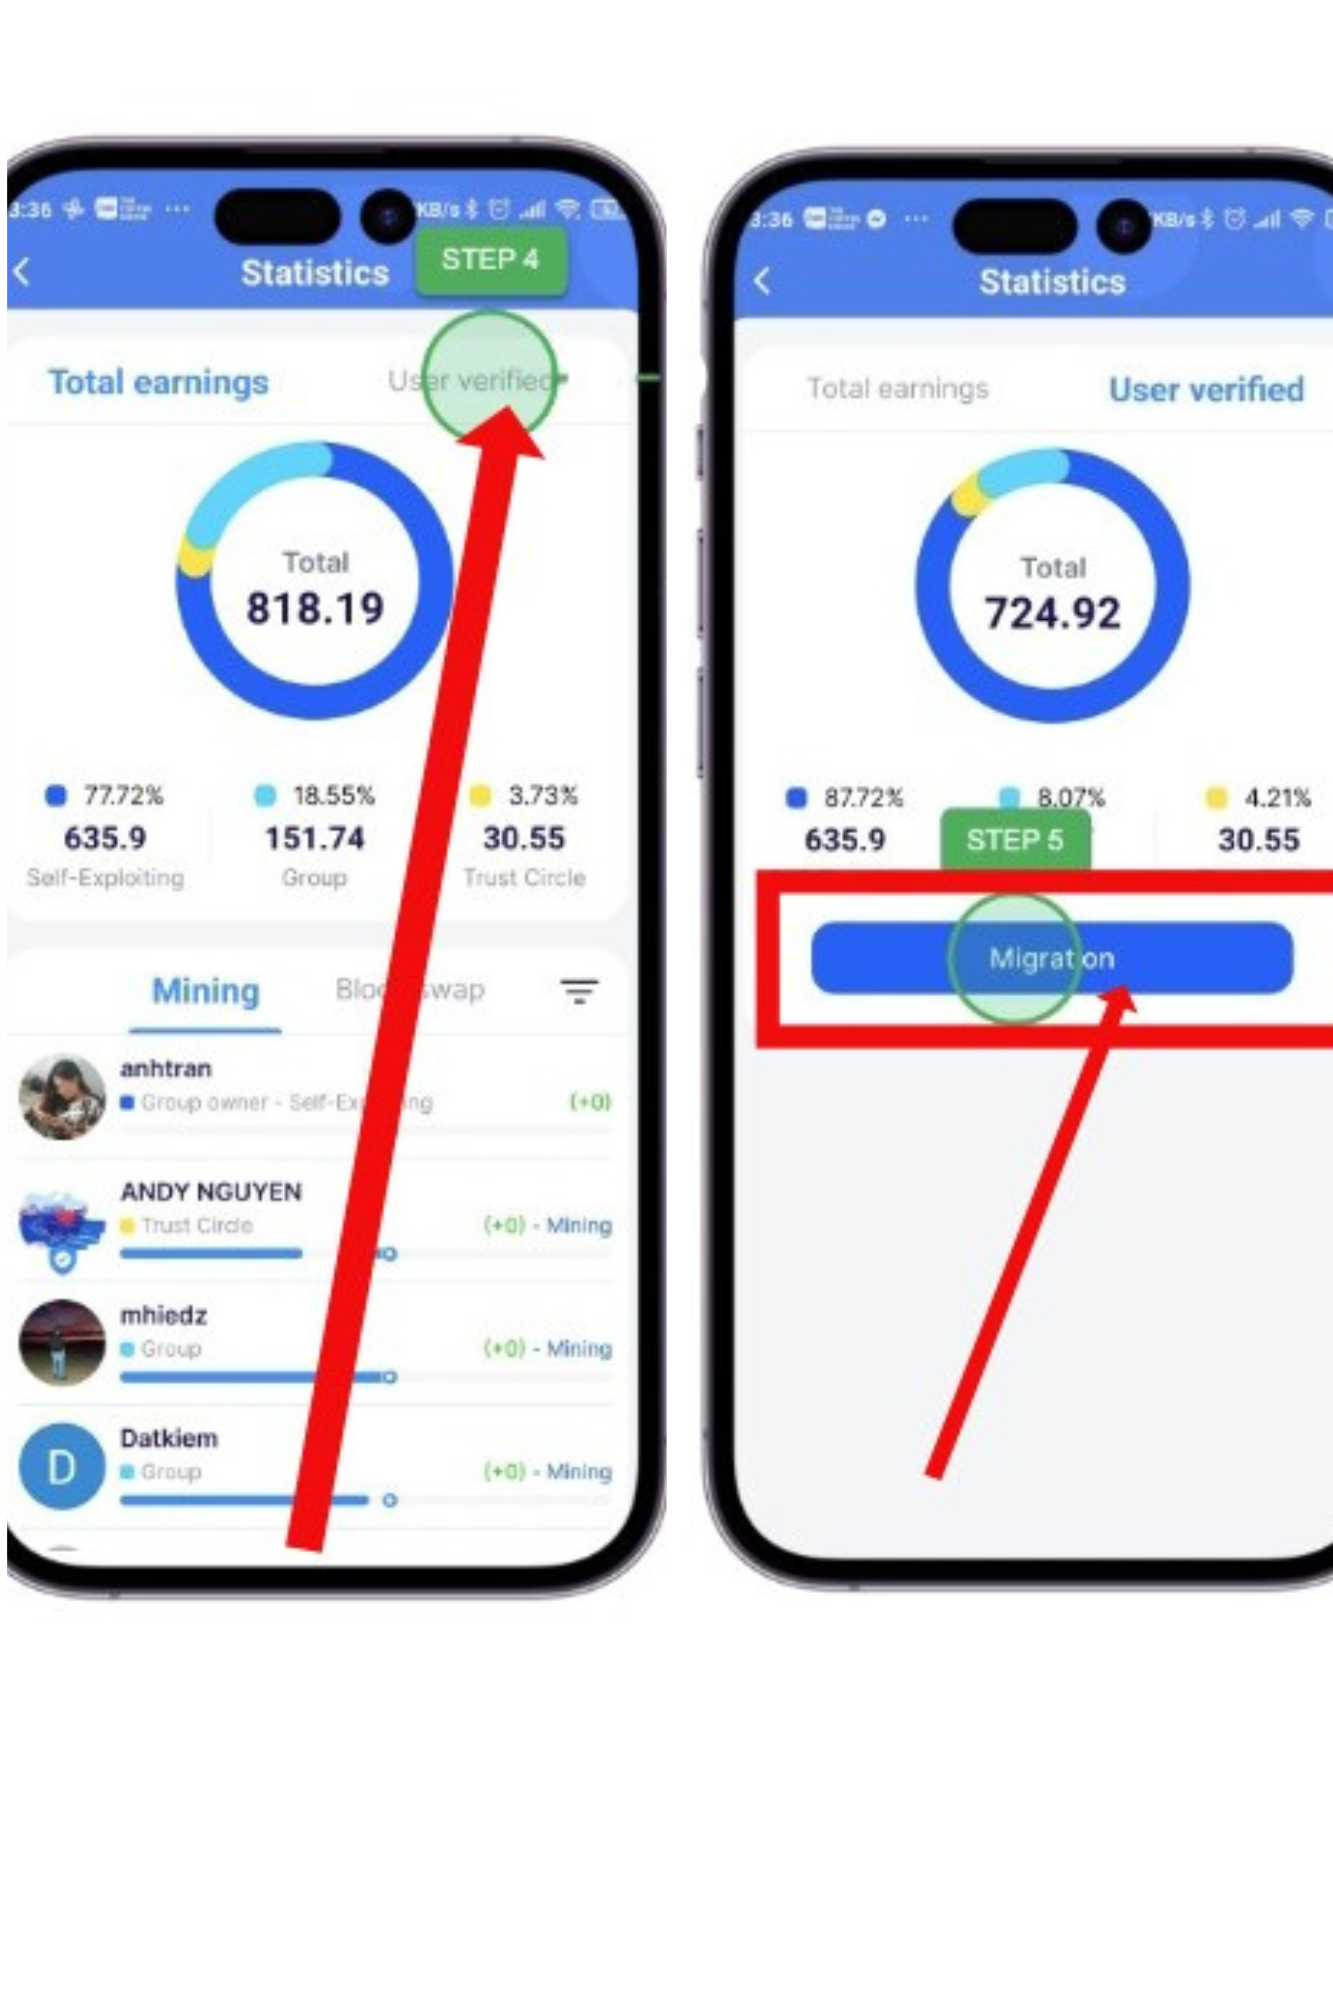
Step 4: Opt for “User verified” to reveal verified and transferable mining metrics for both you and your team.
Step 5: Click on the “Migration” action to navigate to the migration options screen.
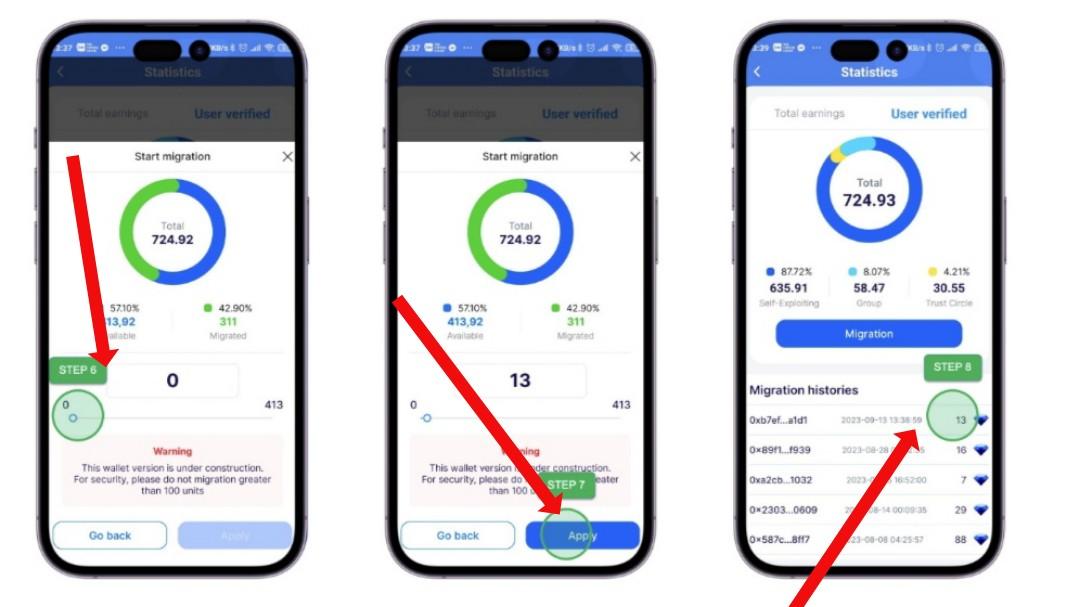
Step 6: Adjust the slider to specify the quantity you want to move and view the total available and transferred amounts on this screen.
Step 7: Press “Apply” to initiate a transfer command from the mining archive to your Rubi wallet.
Step 8: Examine your migration history from this screen to review past migrations.
Conclusion
By following these simple steps, you’ll seamlessly migrate your mined Rubi block assets to your wallet, ensuring your crypto investments are secure and accessible whenever you need them. Once again congratulations, and keep mining Rubi block token to accumulate more tokens.
Feel free to share your thoughts and comment below. Your feedback is valuable to us!
Advertisements
1 thought on “How to Migrate Rubi Block Assets to Wallet – Best Guide”